How to Play TPC Scottsdale's Stadium Course, Hole by Hole
You booked the tee time. Maybe you paid around $310 for a slow morning in July, maybe $550 for a Saturday in March -- either way, this isn't a round you get to redo next month. TPC Scottsdale's Stadium Course is the round every Scottsdale golf trip is built around, and it plays differently than anything else in your bag's memory.
Here's why. Tom Weiskopf and Jay Morrish didn't discover this golf course in the desert -- they built it, in 1986, specifically so tens of thousands of people could stand on man-made mounds and watch professionals play. Every green complex, every angle, every sightline was shaped for spectator viewing as much as shot values. You're playing a stadium. It's just empty most days, and the empty version is honestly the better one.
That history changes how you should think about your round. This is target golf in the most literal sense: fairways are generous by desert-course standards, but everything outside them -- native scrub, decomposed granite washes, the odd saguaro -- doesn't give a golf ball back. You're not aiming at "the general area" on any tee shot here. You're aiming at a spot.
The greens are the other half of the equation, and they're what first-timers underestimate. TPC's crew keeps this course at tournament conditioning nearly year-round -- overseeded ryegrass in winter, greens rolling 11-plus on the Stimpmeter -- and the putting surfaces are large, firm, and built to reject anything imprecise. A shot that lands pin-high but spinning releases well past the hole. A shot short of the correct tier rolls back down. Distance control matters more here than it does at your home course, on nearly every approach.
None of that means you should play scared. It means you should play specific. Below is every hole -- the tee decision, the approach, and the miss that turns a good score into a bad story -- with extra depth on the 15-16-17-18 stretch that closes the show every February during the WM Phoenix Open.
The Card, Hole by Hole
A quick-reference look at the whole round before you play it hole by hole below. Par is 71 from every tee; total championship yardage is 7,261.
| Hole | Par | Yards | Hole | Par | Yards |
|---|---|---|---|---|---|
| 1 | 4 | 403 | 10 | 4 | 428 |
| 2 | 4 | 416 | 11 | 4 | 484 |
| 3 | 5 | 554 | 12 | 3 | 195 |
| 4 | 3 | 183 | 13 | 5 | 595 |
| 5 | 4 | 470 | 14 | 4 | 477 |
| 6 | 4 | 436 | 15 | 5 | 553 |
| 7 | 3 | 215 | 16 | 3 | 163 |
| 8 | 4 | 475 | 17 | 4 | 332 |
| 9 | 4 | 453 | 18 | 4 | 442 |
Yardages above are from the championship tees, compiled from the course's published scorecard and cross-referenced against multiple course-data sources. TPC moves tee markers day to day, so treat these as a close guide rather than gospel -- your tee sheet on the day you play is the final word.
Front Nine: Build a Score Before the Course Gets Serious
The front nine won't test your nerve the way the back nine does -- there's less water, less theater, and no stadium mounds waiting to swallow you whole. What it will test is your patience with small, firm greens and fairway bunkers that sit exactly where you'd naturally want to hit it. Play smart here and you'll walk to 10 with a card worth protecting.
Hole 1 — Par 4, 403 yards
The gentlest opening hole you'll find on a course this good. No water, no fairway bunkers, and a fairway wide enough to absorb a nervous first swing. Hit driver and get the jitters out here, not on 16.
The approach is where hole 1 quietly reintroduces you to the rest of your day: the green is small and firm, and it won't hold a shot that's steered instead of committed to.
The miss that kills you: babying a mid-iron because you're still thinking about the tee shot on 16. Commit to a full swing at a smaller target rather than a half-swing at a bigger one.
Hole 2 — Par 4, 416 yards
Two bunkers pinch the fairway in the 280-315 yard band off the tee -- comfortably out of range for most visiting amateurs, so play your normal tee shot and don't overthink it.
The green is where hole 2 bites. Three bunkers ring a putting surface that breaks in more than one direction depending on where the flag sits.
The miss that kills you: short-siding yourself into one of those bunkers. Miss to the fat side of the green, not the pin side, until you've watched a putt or two break.
Hole 3 — Par 5, 554 yards
The first of three par 5s, and the most gettable. One bunker guards the left side of the landing area -- start your tee shot at it and let the hole pull the ball back into the fairway.
Long hitters get a real look at the green in two, but the fairway narrows before you get there and water guards the left side of the approach. Most players are better off picking a number they like for a full third shot than forcing a long iron over trouble.
The miss that kills you: getting greedy on the second shot without the yardage to back it up. This is your first honest birdie hole. Don't let it become your first double.
Hole 4 — Par 3, 183 yards
The shortest par 3 on the card, and the one where distance control matters more than shot shape. Mid-iron, take the number the wind gives you, and commit.
There's nothing gimmicky about the green -- it's just small, so a shot finishing mid-green is a good shot regardless of which tier it lands on.
The miss that kills you: pin-hunting. Play to the center of this green and take your two putts.
Hole 5 — Par 4, 470 yards
One of the longer two-shotters on the front nine, and it plays every yard -- a hole that rewards a good drive rather than one that simply punishes a bad one, since there's real length left either way.
The approach demands precision over power: a mid-to-long iron into a green built like the rest of them, firm and unwilling to hold a shot hit without a plan.
The miss that kills you: coming up short and left, into collection areas that turn a two-putt into a scramble for bogey.
Hole 6 — Par 4, 436 yards
A slight dogleg left with fairway bunkers sitting right where a comfortable tee shot wants to go. Take one club less off the tee if you're not fully trusting your swing that day, and play for position over distance.
The green is protected enough that a mediocre approach gets punished harder than the yardage alone suggests.
The miss that kills you: finding a fairway bunker off the tee and turning a routine par 4 into a lost stroke before you've reached your ball.
Hole 7 — Par 3, 215 yards
The longest par 3 on the course, and the one where you need to be honest about your yardages. This isn't a short iron for most amateurs -- it's a real club, sometimes a hybrid or fairway wood depending on the tee markers that day.
The green accepts a running shot better than a high, soft one, which suits the way the wind usually moves out here.
The miss that kills you: choosing pride over club selection. Take enough club to reach the green, even if that means a 3-wood on a par 3.
Hole 8 — Par 4, 475 yards
The scorecard rates this the second-hardest hole on the course, and the numbers back it up: one of the longest two-shotters you'll face all day, doglegging left around a pair of bunkers guarding the inside corner.
Cutting the corner brings the bunkers into play; bailing safely right leaves a longer approach into a green that isn't inclined to make up the difference.
The miss that kills you: trying to be a hero off the tee on a hole that's already long enough without one. Take the line that avoids the bunkers, even if it costs a few yards.
Hole 9 — Par 4, 453 yards
A long, straight closer to the front nine with a fairway generous enough to invite an aggressive tee shot -- take the invitation, because the approach doesn't offer the same forgiveness.
Expect a long iron or hybrid into a green that's bigger than most on the course but still well-guarded, which makes club selection matter more than shot-shaping.
The miss that kills you: leaving your approach short in the front bunkers after underclubbing a shot that plays longer than the number suggests. Take one more club and make a full swing.
Back Nine: Where the Course Turns
Everyone talks about 16 when they talk about the Stadium Course's back nine. Ask golfers who've actually played all eighteen holes, though, and 11 usually comes up first. The back nine opens with a stretch tougher than its reputation, then hands you off to the four-hole finish everyone actually came to play.
Hole 10 — Par 4, 428 yards
A slight dogleg right to open the back nine, and a hole that wants a tee shot shaped gently with the turn rather than one hit dead straight at the corner.
The green is guarded enough to punish an approach played from the wrong side of the fairway, so position off the tee matters as much as distance.
The miss that kills you: bailing out left off the tee and leaving yourself a blocked angle into the green. Commit to the shape the hole is asking for.
Hole 11 — Par 4, 484 yards
Forget the scorecard for a second. Ask people who've played this course which hole actually beat them, and more say 11 than say 16. It's the longest, most demanding two-shotter on the property, built on what architects call reverse camber: the hole doglegs right, but the ground slopes left toward a pond running its full length. Gravity and the shape of the hole are pulling you in opposite directions.
Miss right off the tee and you're in the trees with a blocked shot. Miss left and you're wet. The correct play is a tee shot started down the right side that lets a 4-to-5-foot cross-slope feed it back toward the center -- which asks for more trust than most amateurs want to give a swing on the hardest hole of the day.
The approach is long even from a good drive, into a green that sits above the fairway. Par here is a genuinely good score, and a bogey shouldn't change how you feel about your round.
The miss that kills you: fighting the slope instead of using it. Trust the tee shot, take your par or bogey, and move on.
Hole 12 — Par 3, 195 yards
A breather, relatively speaking -- the scorecard rates this one of the easier holes on the course, but "easier" at Stadium still means a mid-to-long iron over trouble to a green guarded by a handful of bunkers.
Miss to the fat part of the green and take your two putts. This isn't the hole to find out what your flop shot looks like.
The miss that kills you: relaxing because the card says the hole is easy, then making a lazy swing. Respect every par 3 here the same amount.
Hole 13 — Par 5, 595 yards
The longest hole on the course, and -- somewhat surprisingly given the yardage -- one of the two easiest by scorecard rating. It's a three-shot hole for the overwhelming majority of golfers who will ever play it, so plan it that way from the tee.
The elevated view of the green and surrounding desert makes this one of the prettiest spots on the property. It's also one of the few places during tournament week where fans can actually hear themselves think, away from the roar at 16.
The miss that kills you: trying to reach a three-shot hole in two. Pick a layup number, hit a full shot into it, and give yourself a real wedge for birdie instead of a half-swing from a bad angle.
Hole 14 — Par 4, 477 yards
A long dogleg left that even scratch players treat with respect. Water can come into play along the fairway on both the tee shot and the approach, and the green sits perched above the fairway, angled behind a pair of bunkers.
You need a committed mid-to-long iron to hold the green in regulation -- anything tentative gets rejected by the same firm putting surfaces you've been fighting all day.
The miss that kills you: steering the tee shot away from the water and into the rough on the opposite side, then trying to reach a well-guarded green from a bad lie. Pick a line and commit to it.
The Finish: Holes 15 Through 18
This is the stretch people fly in for. Four holes, four different decisions, and during the WM Phoenix Open, four of the loudest venues in professional golf. On the Tuesday you play it, there won't be 20,000 people watching -- but the architecture doesn't know that, and it tests you exactly the same.
Hole 15 — Par 5, 553 yards
The tee shot sets up everything that follows. Water runs tight down the left side of the fairway and stays in play all the way to a green that sits close enough to the water's edge to play like an island. Start your drive at the right side of the fairway -- a miss right here isn't really a miss, it's the smart play.
That's also the catch. Bail out right off the tee and the position you're left with usually forces a layup; going for the green in two from the right side means a worse angle and more water to carry. Golfers who make this hole work decide their strategy on the tee, not halfway through the second shot.
Going for it means carrying water the whole way to a green that slopes away at the edges -- a shot that's long or spinning doesn't get a friendly bounce. Laying up means treating your third shot like any other approach: pick a full number, commit, and leave yourself a wedge rather than a delicate pitch.
The miss that kills you: a go-for-it swing you weren't actually committed to. Decide on the tee box whether you're playing for birdie or playing for par, and don't let the green change your mind mid-swing.
Hole 16 — Par 3, 163 yards, "The Coliseum"
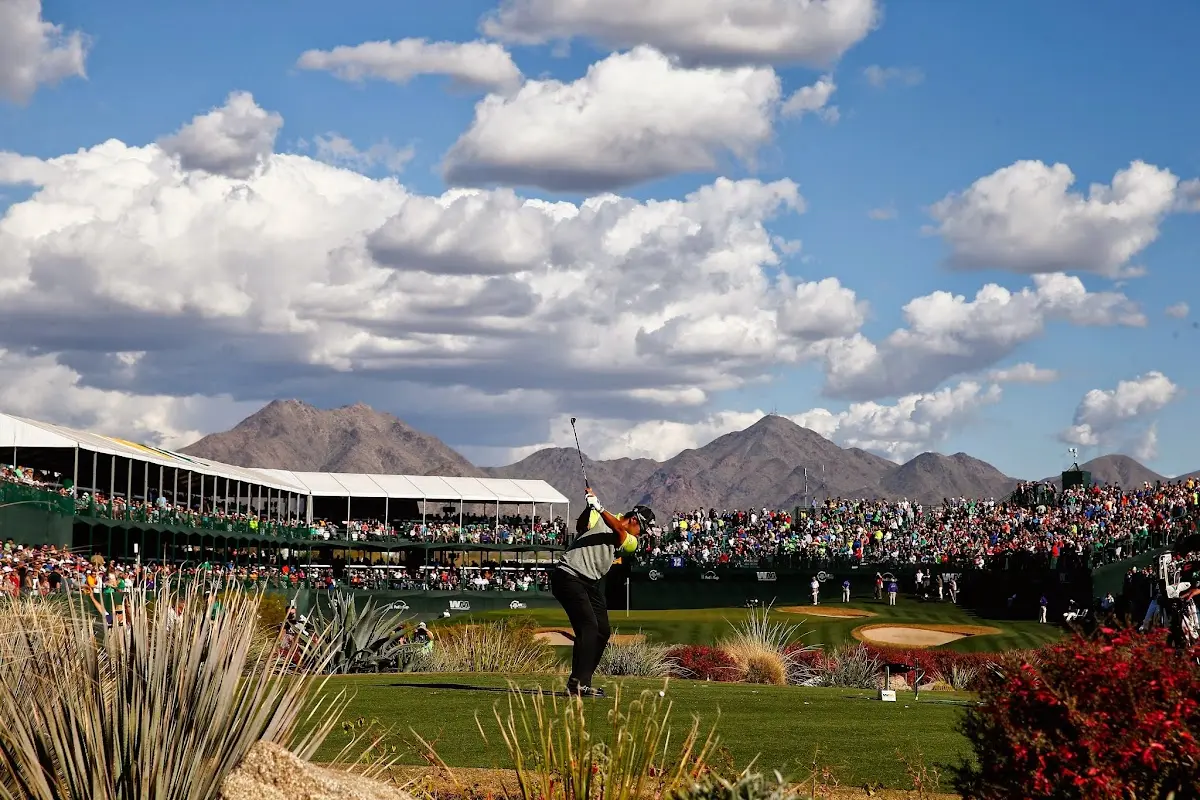
You know this hole before you've ever set foot on the property. During the WM Phoenix Open, temporary grandstands turn this 163-yard par 3 into the loudest, most fully enclosed hole in professional golf -- completely surrounded by stadium seating more than 20,000 fans deep, with a concert stage that's become part of tournament week in its own right. Players get cheered for good shots and heckled without mercy for bad ones. It's part golf, part arena.
A 21-year-old Tiger Woods made the hole famous in 1997, acing it with a 9-iron during the third round of what was then simply the Phoenix Open, then raising the roof as the crowd showered the green with beer. It was his first hole-in-one on the PGA Tour, and the tee that week was set at 152 yards -- pin and tee markers move daily during tournament week, part of why the hole plays so differently round to round, even for the pros.
On the Tuesday you play it, the stands are gone. What's left is a genuinely well-designed short par 3: a small, elevated green guarded by bunkers, demanding a precise number more than a big swing. The front-left portion of the green is the safest miss if you're not fully committed to your yardage.
The miss that kills you: letting the moment take your swing away from you. Everyone who plays this hole slows down on the tee box, and that's fine -- take the photo, feel the history. Just don't let the pause turn into tension once you actually pull the club back.
Hole 17 — Par 4, 332 yards
One of the best short par 4s in golf, and a hole where "shortest doesn't mean easiest" is the entire lesson. At 332 yards, longer hitters can seriously consider the green from the tee -- but the putting surface is oddly shaped and water guards the left side, so a driver that misses left doesn't just cost a stroke, it can cost the hole.
The safer play, and for most amateurs the smarter one, is a layup to your favorite wedge distance. Miss right if you miss at all -- short and right leaves a manageable pitch, while anything left brings the water into the conversation.
Where the pin sits changes everything. A back-left pin brings a greenside bunker into play for anyone who goes for the green and gets blocked out; a front pin rewards the layup-and-wedge approach more than the hero shot.
The miss that kills you: going for the green with a swing you're not actually committed to, just because the pros do it on TV. Lay up, wedge it close, and take your birdie chance without the water in the conversation.
Hole 18 — Par 4, 442 yards
The finishing hole plays like what architects call a Cape hole: water runs down the entire left side of the fairway, and the tee shot rewards whoever is willing to bite off the most dangerous angle. The safe tee shot bails right and leaves a longer approach; the aggressive tee shot cuts closer to the water and shortens the hole considerably.
For a one-time visitor, there's little reason to flirt with the left side. Aim comfortably right of the fairway's center, accept the longer approach, and keep your ball dry.
The approach plays into a green with water still lurking left, which means the same discipline that got you off the tee safely needs to hold for one more swing. This is not the hole to find out what a hooked iron looks like.
The miss that kills you: pulling the tee shot or approach left, chasing a line the water doesn't respect. Pick the club you trust, not the one that looks impressive, and enjoy the walk up the same closing hole the WM Phoenix Open field plays every February.
If You Only Remember Five Things
- Play a tee that fits your handicap, not your ego. The 7,261-yard card is tournament yardage. The Players tees, around 6,600 yards, put most visiting golfers into mid-irons instead of hybrids on these greens -- ask the pro shop which set matches your game.
- These greens punish indifferent shots, not just bad ones. TPC keeps them large, firm, and fast. A committed shot to the center of the green beats an ambitious shot at the pin on almost every hole here.
- 11, not 16, is the hole that actually beats people. The scorecard rates 8 as the tougher par 4 on paper, and 16 gets all the attention -- but the reverse-camber 11th, water down the entire left side, is the hole visiting golfers bring up on the drive home.
- 15 through 18 is a four-hole decision test, not a distance test. Decide your strategy on each tee box -- go or lay up on 15, commit to your number on 16, lay up or go for it on 17, play safely right on 18 -- and stick with it through the swing.
- Take the photo on 16, then let it go. Every golfer who plays this course pauses on that tee box. The ones who post a good number there are the ones who make their normal swing once they're done soaking it in.
Frequently Asked Questions
What tees should I play at TPC Scottsdale Stadium Course?
Whatever set matches your handicap, not the tips. The course stretches to 7,261 yards from the championship tees -- tournament yardage most visiting amateurs shouldn't play. The Players tees, around 6,600 yards, are the tee visiting low-to-mid handicappers consistently recommend, with shorter options available down to roughly 5,000 yards. Ask the pro shop which tee fits your game before you tee off on 1.
Can you walk the Stadium Course?
Technically yes, practically no. Arizona heat combined with the distance between greens and tees makes walking a tough ask for most visitors, and the course is built around cart play. If you're determined to walk, book the earliest tee time available in the cooler winter months.
Is TPC Scottsdale Stadium Course worth the green fee?
For a once-in-a-lifetime round -- standing on the 16th tee, playing the same finishing stretch the WM Phoenix Open field plays every February -- most golfers who've done it say yes. If you're chasing value over bragging rights, the Champions Course next door delivers the same TPC conditioning for a fraction of the price. Either way, timing the visit right for season and time of day makes the biggest difference in what you pay.
When should I book my tee time?
Thirty to sixty days out during peak season, January through March, for a real choice of times. Shoulder season and summer bookings can often be made with a week or two of notice. In any season, morning tee times sell out first, and twilight times are both easier to get and meaningfully cheaper.
Does the WM Phoenix Open affect course conditions or when I can play?
Both. The course closes to public play for roughly ten days around the tournament, which falls in the first full week of February most years -- don't plan a trip around that window expecting to play. Outside tournament week, the course holds tournament-caliber conditioning year-round, since the crew that preps it for TV also preps it for your Tuesday round.
What's the hardest hole on the Stadium Course?
By the scorecard's handicap rating, the 8th -- a long, dogleg-left par 4. By reputation among golfers who've actually played all eighteen, it's the 11th: a reverse-camber par 4 with water down the entire left side that plays every bit of its 484 yards. The famous 16th, by contrast, is short and manageable once the crowds and nerves are out of the equation.
Should I hire a forecaddie?
Worth considering on a first visit. A good forecaddie reads greens you've never seen, points out which bunkers are actually in play from your angle, and can save a stroke or two on a course where the correct miss isn't always obvious. Availability and cost vary by season -- ask when you book your tee time.
Before You Book
A few things worth knowing before you commit to a tee time. Green fees swing hard by season and time of day -- our shows exactly where the Stadium Course lands against the rest of the Valley, and against its own sister Champions Course. For dress code, forecaddie details, practice facilities, and a full breakdown of both TPC courses, the covers everything this article doesn't. Current rates, hours, and booking details live on the .
If you're playing Scottsdale often enough that a handful of $400-plus green fees a year is starting to look like it should just be a membership, our breaks down what that actually costs.
